Why your Mac is running slow
Before we learn how to make your Mac run faster, it’s helpful to determine why your Mac is getting slow. The age of your machine and how much you use it has some effect, but that doesn’t explain everything. There are many possible causes for a slow Mac, so let’s try to identify the reasons why it’s happening before we troubleshoot.
Why is my Mac running slow? It could be due to:
-
Full hard drive: To compensate for low short-term memory, your computer is forced to store things on the hard drive. If it’s chock-full of apps and large files, there won’t be enough space left to help apps and other processes run. And if you’re using a hard disk drive (HDD), lack of space means you can’t defrag your disk to help boost performance.
-
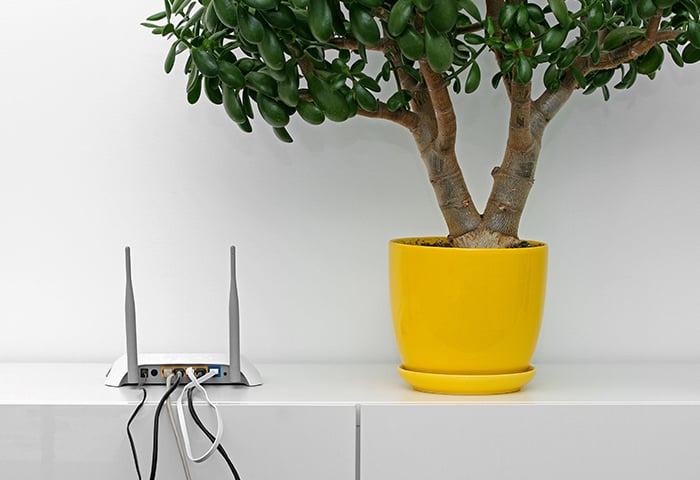
Slow internet connection: If your browsing and video streaming is too slow or stuttering, the problem might not be your Mac at all — it may be caused by a slow internet connection.
-
Age and overuse: If you’re still rocking a 2004 MacBook, or if you constantly use lots of process-heavy apps like video editors or games on an older machine, your computer is going to be a little worse for the wear.
Check your internet speed
Before we dive into our top ten ways to speed up macOS, let’s check your internet speed. Go to www.speedtest.net and run their test — it only takes a few seconds!
If you’re not getting fast enough speeds, try our favorite methods for boosting your home Wi-Fi signal. If you’re still struggling with slow speeds after that, it’s time to call your internet service provider to see what’s going on and whether they can fix it on their end.
Once you’ve determined that your internet service isn’t the issue, then it’s time to jump into our tips to speed up macOS.
How to speed up your Mac
If your Mac is running slow, follow the tips in this guide to speed up your MacBook, iMac, or other Mac model and get it running like new. Here’s how to speed up your Mac in 10 easy steps.
1. Install any updates
Software updates include security fixes and other necessary improvements that can make your Mac run faster.
Here’s how to update your Mac:
-
Check the Apple icon in the upper-left corner of your desktop.

-
Click on System Preferences to see if there’s a macOS update. If there is, click Update.
-
Check the box to keep your system updated automatically.

-
Your computer will take some time to update your system, and will then need to restart.

-
If you have outdated apps, you should update those as well. Click the Apple again, then select App Store if you see that there are updates available.
-
The App Store will then display all the apps you own that have possible updates, including the reason they should be updated — such as “bug fixes” or “stability and performance improvements.”

-
Click on the individual app you want to update and follow the instructions. If you see apps you don’t actually use here, skip to the next section to get rid of them.
2. Uninstall unused apps
Unused apps can take up lots of space and bog you down, and they may be another reason why your Mac is running slow. Here’s how to uninstall apps:
-
Open Finder and select Applications.
-
Find the little grid icon and select Date Last Opened.

-
Scroll down to the bottom to find apps you haven’t used in a long time. Select the app you want to delete.

-
Drag the app to your Trash to uninstall it, and then make sure to empty the Trash.
Boom! Now the app is off your computer, where it can no longer eat up your space or CPU power. Repeat the process to get rid of other apps you no longer use. And don’t worry; you can always download the app again from the App Store if you find yourself missing it later.
Not sure which apps will give you the most bang for your buck, space-wise? Let’s find out which programs take up the most space and power on your system.
Find and disable the most power-hungry processes
Let’s dig a little deeper and see what’s really dragging your Mac down.
-
Open Finder, click Go, and then select Utilities.

-
Select Activity Monitor, which will show you a variety of information about your system and device performance.
-
Click the tab for CPU at the top. Your central processing unit is what computes everything you do. If it gets bogged down by a resource-hungry process, it’ll slow everything else down.
-
Click the arrow on % CPU to sort by the highest percentage.
.png?width=593&name=img_09%20(2).png)
-
Here you can see what’s taking up the most computer power. Some tasks can’t be stopped, such as those necessary for vital computing functions. Check the User column. Anything listed as _windowserver or root cannot be disabled. Instead, look for apps that are listed under your username.
-
Look for anything that consumes 5–10% of CPU usage.

-
Here YouTube is consuming 4.4% of CPU power, which is a lot. You can easily get those resources back by closing YouTube. If the app tries to resist, click Force Quit.
-
If you see any processes on this list that you aren’t familiar with, it’s best to Google them before deleting — make sure it’s nothing important before you give it the boot.
-
Check out the other tabs in the Activity Monitor: Memory, Energy (aka battery life), Disk, and Network to see what apps or processes are taking up other valuable resources.
-
Check Energy to see which of your apps are taking up the most of your power. Sort by 12 hr Power to see which apps have used the most power in the last half a day.

-
If you see anything that’s taking up a lot of power, avoid using it when you want faster speeds for other priorities on your Mac.
-
If you check regularly and find out that a single app is taking up way too much power, uninstall it using the steps above.
Remove malicious software
It’s a myth that Macs can’t get viruses. Just like PCs, Macs are susceptible to malicious software, or malware. Historically, hackers focused more of their efforts on PCs simply because there are many more Windows machines in use than Macs. But lately, more and more cybercriminals are turning their efforts towards Apple.
Rogue code can get onto your system, damage performance, slow you down, and steal your sensitive data. Check out our ultimate guide to Mac security and remove anything nefarious that might be lurking underneath your machine’s hood.
Then, equip your Mac with AVG AntiVirus FREE for Mac to make sure you stay protected against hackers, rogue code, and the growing number of other Mac malware threats out there.
3. Remove unwanted files
Files can also take up a lot of space and memory, and a cluttered Mac can experience unresponsive apps and reduced disk space. What kind of files might be taking up space on your Mac?
-
Movies and TV shows you’ve already watched.
-
Blurry and duplicate photos: Do you tend to take five shots of everything, trying to get the perfect angle? You probably don’t need all of these hanging around.
-
Temporary files: macOS and other apps create temporary data and thousands of cache files during their necessary running process, and they don’t delete these excess files once they’re no longer needed.
-
Files in Trash: The files still exist until you actually empty out the Trash.
All of these can really add up and bog you down. That’s why removing unnecessary files can fix a slow-running Mac. Let’s start with tracking down your largest files and documents.
-
Open up Finder and hit Command + F to open up a search window.
-
Click on the Kind menu and select Other.

-
Scroll down through the options and find File Size; check the blue box on the right.

-
Back on the Search screen, make sure you select to search This Mac. To the right of File Size, go to the next drop down menu and select is greater than. Then type in a number, such as 100, and select MB from the last drop down menu.

-
You can now see the biggest items on your system, including apps and large files.
-
Now you can go through every item one by one and move everything you no longer want or need into the trash.
-
Make sure to empty the Trash so the files actually get removed.
Depending on how many old files and apps you’ve been hoarding, this process can take quite some time. Not only that, but this process doesn’t even cover all the temporary data and cache files that macOS and other apps leave behind as they run. Even if you could find all those files yourself (which are scattered all across your hard drive in difficult-to-find folders), they would accumulate again after just a few days of normal computer use.
Clean up your Mac with a specialized cleanup tool
The best, easiest, and fastest way to track down all the junk on your Mac is to use a dedicated cleanup tool. And we happen to have just the thing for that: AVG TuneUp for Mac. Here’s how to use it to scour your machine for all the junk you no longer need, then whip your machine into shape.
-
Download AVG TuneUp for Mac by clicking the button above.
-
Complete the installation process.
-
On the main dashboard, under Clean Clutter, click Scan.
-
AVG TuneUp will show you just how much hidden clutter is lurking in your system.

-
Hit Clean to get rid of these unnecessary application caches, log files, and trash!
-
Go back to the main dashboard and click Scan under Find Duplicates. This scan will detect all of your duplicate files that you have saved accidentally. It’ll give you the option to scan just your user folder, your whole hard drive, and even your external storage. Note that scanning entire disks can take a while.

-
Once the scan finishes, review the list of duplicates and remove whatever you no longer need.
-
Back on the main dashboard again, click Find under Find photos that are bad or similar. Select all the locations where you have photos stored.
-
It’ll scan your computer thoroughly and sort photos you might want to get rid of into two categories: bad photos and similar photos. Click Review and then Compare these to see your photos (nothing will be deleted unless you specify!).

-
Select all the photos you no longer want and click Remove.
-
Now that you have AVG TuneUp, you can choose your settings for automatic maintenance so your Mac stays fresh, clean, and speedy!
Clean up your desktop
Your desktop screen can easily get cluttered with screenshots, downloads and other files, icons, and widgets. Desktop items reside inside your RAM (short-term memory), taking up valuable resources that your Mac could be using for other tasks. A cluttered desktop consuming lots of RAM could be another cause for why your Mac is running slow.
Having a few things on your desktop is unlikely to have a significant impact. But if you have hundreds of icons, pictures, movies, etc. stored on your desktop, you can see an increase in performance and speed by cleaning things up. That’s especially true if you don’t have much RAM to spare.
-
Go to your crowded desktop. Right click (or click with two fingers) and select New Folder.

-
Name your new folder anything you want, such as Files from Desktop.
-
Hit Command + A to select everything.
-
Hold down Command and click on the new folder to deselect it.
-
Drag all of your highlighted files into the new folder.

-
Drag the folder into your Documents folder in the sidebar.
-
Enjoy your clean new desktop!

Move your photos to iCloud and adjust other storage settings
Photos are some of the largest files, and today’s smartphones make it very easy to amass a large photo library. But having too many files can quickly fill up your storage capacity and slow down your Mac.
If you aren’t willing to part with any of your photos, a good solution is to move them into the cloud. That way your photos will be saved and accessible, but they won’t take up space on your system. Here’s how to host your photos in iCloud.
-
Click the Apple icon and select About this Mac.

-
Click the Storage tab, and then select Manage…

-
Here you’ll see a few options of how to increase space on your Mac.

-
Click Store in iCloud… and then you’ll choose exactly what you want to store.

Optimize storage settings
Back on the previous screen, you also have options to optimize file storage.

-
Optimize Storage: Hit Optimize… This will save space by getting rid of TV shows and movies that you’ve already watched on Apple TV and iTunes. (You can download them again later if you want.)
-
Empty Trash Automatically: Click Turn on… When you put files into Trash, they don’t actually get deleted until you remember to empty it. This setting allows you to have all files left in trash for longer than 30 days removed automatically.
-
Reduce Clutter: Click Review and you’ll be able to see large files you have saved in Documents, Applications, Music, and Music Creation. You can sort through and delete whatever large files you no longer need.

4. Empty caches
Your browser caches various elements of the web pages you visit, which speeds up loading times on repeat visits. Other apps store things in caches as well, such as photo and video editors that retain temporary data. Even Apple’s own apps create cache data, but these tend to be small enough that you don’t need to worry about them.
A full cache may be yet another reason why your Mac is running slow. Clearing your browser’s cache will help it run faster and make sure you aren’t viewing any outdated content. While you’re at it, you can clear out your browser cookies and delete your browser history as well. And clearing out photo and video editor caches can free up additional space in your system, which will in turn help speed up your Mac.
Let’s clear out your browser cache in Safari first.
-
Click on Safari and then hit Preferences.

-
Click Advanced and then tick the box for Show Develop menu in the menu bar.

-
Develop will now be an option on the Safari menu bar; click it and select Empty Caches.

-
Click it and you’re good to go!
Now let’s clear out your system and user (also called application) caches. This isn’t necessary unless you have a lot of large files cached, such as those from photo or video editors.
Before we get started, back up your Mac. When you go messing around in your caches, you could break something if you’re not careful. Let’s clear out the user cache first.
-
Open up Finder and hit Go, then Go to Folder.

-
A window will pop up. Type in /Users/[your username]/Library/Caches and hit Go.

-
You’ll now see all the user or application caches saved on your system. You can drag anything you don’t need to the Trash and then empty it.

-
Again, be careful not to delete anything you might need.
-
To clear out the system cache, navigate again to Finder > Go> Go to folder… and then type in ~/Library/Caches/.

-
You’ll see your system cache and can delete what you wish by dragging it to the Trash and then emptying the trash.

-
Again, be careful not to remove anything that might be important. A dedicated cleaning tool, such as AVG TuneUp, will remove your junk files while preventing you from accidentally deleting anything essential.
5. Cut down on startup programs
Many apps are programmed to start automatically as soon as you boot up your computer, but they often aren’t necessary and can negatively impact your speed from the moment the system is switched on. You can choose to limit your startup programs to just the essentials.
-
Click the Apple icon in the top left and then open System Preferences.
-
Choose Users & Groups.
.png?width=649&name=img_34-2%20(1).png)
-
Select Login Items. Here you can see all the programs that start automatically and disable the ones you don’t need.

-
Click the lock and enter your password to make changes.
-
To find even more hidden startup items, click finder and then Go.
-
With the Go menu open, hold down the Option key on your keyboard. This will make a new option, Library, appear in the list — click it.
-
Scroll down the list of folders and select LaunchAgents. Here you’ll see apps and processes that are set to launch automatically upon startup.

-
If you see anything you don’t need, delete it! (If you’re not sure what something is, Google it before you get rid of it.)
6. Turn off visual effects
Visual effects — such as animations, transitions, and icons bouncing around — aren’t really necessary. They can negatively impact your performance, especially if you have an older iMac or MacBook. You can easily boost your speed a few notches by disabling visual effects like this:
-
Click the Apple icon and select System Preferences. Then click on Accessibility.
-
Once you’re in Accessibility, click on the Display tab. Check the box for Reduce motion.
 Done! This will especially make a difference in speed for older Macs.
7. Rebuild your Spotlight index
Your Mac’s performance can take a nosedive if Spotlight indexing gets stuck. This may happen after you apply a major macOS update. If you notice that Spotlight search isn’t working properly, here’s how to rebuild the Spotlight index on your Mac.
-
Click the Apple icon, select System Preferences, and click on Spotlight.
-
On the Spotlight screen, click Privacy.
-
Hit the + sign and select a folder or disk that needs to be indexed again into the white box.

-
Once it’s there, click on the folder and then click the — sign at the bottom. That’s it!
8. Try an SSD
Are you still working with an out-of-date hard disk drive (HDD)? Switching to a solid state drive (SSD) will give you a huge jump in performance, including speed. The difference between an HDD and an SSD is significant: when loading data and programs, you’ll go from 100 MB per second all the way up to 3,500 MB per second.
SSDs are cheaper than ever, so getting one is one of the best ways to upgrade your Mac.
9. Upgrade your RAM memory
RAM is your computer’s working memory, where it computes all temporary tasks you do, like using apps, checking your email, and browsing the internet. If you have less than 4 GB of RAM, you could easily be overtaxing your system. (Not sure how much RAM you have? Find out how to check your RAM.)
Even normally daily computing like using Facebook, Youtube, and email can take up a lot of short-term memory. If you use more than your device’s capacity, your operating system is forced to move something you’re not currently using into long-term memory (your hard disk) for a time — and then when you switch back to that app, your computer needs to retrieve that data all the way from the hard drive. This process is called paging or swapping, and it takes a lot of extra time, slowing down your overall performance.
So how powerful does your computer really need to be? The short answer is that it depends how you use it. If you have a larger RAM capacity, your computer can keep more apps and processes running in your short-term memory, which eliminates delays. Depending on what your current capacity is, you can make a big difference by upgrading your RAM.
- If you have less than 4 GB of RAM and you’re a normal computer user (web browsing, email, Office or Google applications, etc.) you should upgrade to at least 4 GB.
- If you do a lot of multitasking, video and photo editing, or light gaming, you’ll want to upgrade to at least 8 GB of RAM.
- If you’re a heavy gamer, a programmer, or a video editor by profession, we’d recommend 16+ GB of RAM.
Unlike PCs, Macs aren’t as personally configurable, but upgrading RAM is usually possible. See Apple’s support pages for their official guidance on upgrading MacBooks, Mac Pro, or iMac.
10. Reset SMC and PRAM
Sometimes an easy fix is all you need. Your Mac’s System Management Controller (SMC) controls its basic functions like managing hardware, Wi-Fi connection, and power. Its Parameter Random Access Memory (PRAM) manages essential settings such as performance information, your audio volume, and keyboard lighting.
If things are out of whack on your Mac, a quick reset of the SMC and PRAM should help right the ship, no matter if you have a MacBook Pro, Macbook Air, or something else.
Resetting your SMC varies a bit depending on what type of Mac you have:
-
For MacBooks with a removable battery: Turn off your MacBook, unplug the cord, and take the battery out. Hold the power button for five seconds. Then reinsert the battery, plug your MacBook in, and restart it.
-
For Mac Minis, Mac Pros, and iMacs: Shut your Mac down and unplug it. Wait 20 seconds, and then plug it in and restart. That’s it!
Resetting your PRAM is the same on all Macs. Here’s how to do it: Shut down your Mac. Hold down Command + Option + P until your Mac restarts. Then you’re done!
Boost your Mac’s performance the easy way
If you followed all the steps in our guide, you can see that it might take you a significant amount of time to properly clean your Mac from top to bottom. And after you do it, a lot of temporary files and other junk will quickly return during the process of normal computer use.
The best way to speed up your Mac in the long term is to use a special Mac cleaning tool like AVG TuneUp for Mac. It’ll hunt down background processes, startup items, cache files, temporary files, duplicate photos, and anything else that may be slowing you down. Not only that, you’ll get automatic maintenance with the touch of a button so your Mac stays a lean, mean, speedy machine.
Speed up your other devices
Have more than just a Mac at home? See our ultimate guide to speeding up and cleaning up your PC and our guide to speeding up your iPhone.

/How-to-speed-up-your-iPhone-Thumb.jpg)